
Ask a merchant what's wrong with their product images and you'll usually hear "we don't have enough of them."
True, but it hides something. There are two separate problems in that sentence, and they need different solutions.
The first is getting a main image at all — one that actually meets the standard. The second is filling out everything behind it. They fail for different reasons, and a workflow built for one will not solve the other.
Problem one: the main image has to qualify
Every other image on a product page is optional. The main image is not. It's what appears in search results, in category grids, in the cart, in the marketplace feed. If it's missing, you often can't list the product at all.
And it's the one image with rules attached. Most marketplaces and many internal brand standards impose requirements on the primary image: a plain or white background, the product filling most of the frame, a minimum resolution, no added text, no watermarks, no props, no packaging, no third-party logos.
That's why finding a main image is harder than it sounds. Search the web for a product and you'll turn up plenty of pictures. What you'll mostly turn up is lifestyle shots with a model and a coffee cup, retailer photos with a watermark burned into the corner, packaging boxes, low-resolution thumbnails, and images of a different colorway.
All of those are images of the product. Almost none of them can be your main image.
So the main-image problem isn't scarcity. It's a qualification problem: finding, among everything you can retrieve, the one file that clears a specific bar.
Problem two: there usually aren't enough of the rest
The second problem is closer to the one merchants describe. Additional images — different angles, detail shots, the product in use, scale references — are what move a listing from acceptable to convincing. They reduce returns because the buyer knows what's arriving.
And for a lot of catalogs, they simply don't exist in reachable form. A mass-market consumer product is photographed from nine angles by five hundred retailers. A specialist industrial component might have one photo in the world, on a manufacturer's PDF datasheet.
This is a coverage problem, not a qualification problem. Here you need breadth: more sources, more retrieved candidates, a willingness to take what you can get.
Same catalog, two opposite needs. One requires you to be strict. The other requires you to be generous.
Both are solved the same way: collect wide, then judge
Here's the thing that makes both tractable. In Dyver, image work always splits into two phases: collect, then place.
Collect means pulling candidate images into a working field. Place means deciding which candidate goes where — main image, gallery, or nowhere.
The temptation is to compress this into one move: write a single instruction that says "find the main product image" and let it run. It works often enough to pass a spot check and fails often enough to embarrass you at scale.
Separate the two and both problems get easier. Collection is where you're generous. Placement is where you're strict.
Collect generously
When you pull images with Extract from URL or Find Product Data, send them to a temporary field — something like _page_images — not straight into a final output field. That field is a candidate pool, not a result.
Set the collection limit well above what you plan to publish. A selection step choosing from two candidates isn't selecting, it's accepting. If you want a compliant main image plus three gallery shots, collect twenty.
This matters most for the main image. The odds that any single retrieved photo meets primary-image requirements are low. The odds that one of twenty does are much better.
Your pool is only as good as your search, so restrict it to sources you trust — manufacturer and brand sites first, especially for long-tail and B2B products.
Teach the system what it's looking at
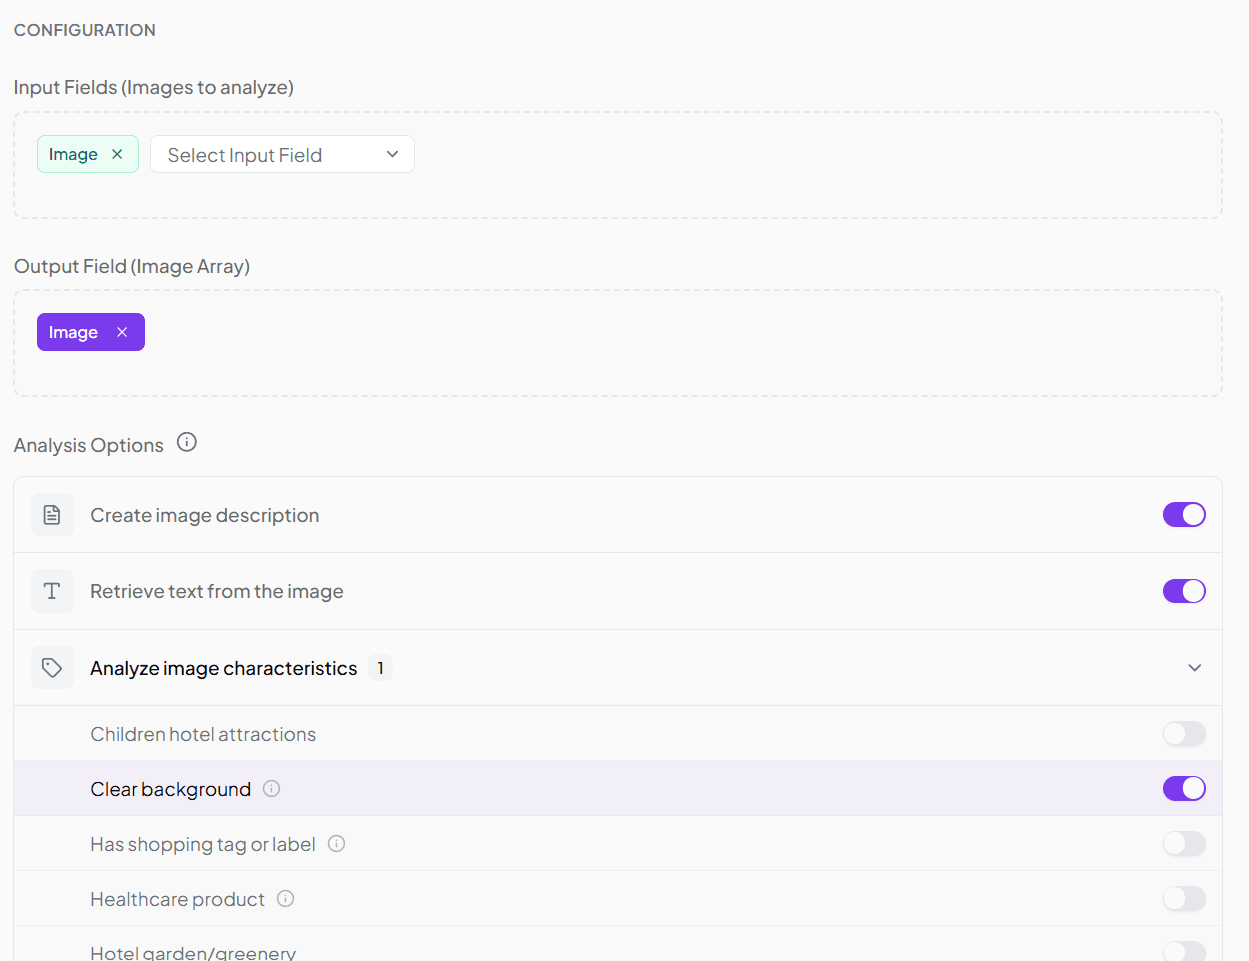
A raw image file tells you nothing about whether it can be your main image. Dyver's Analyze images step is what makes the pool sortable.
It always returns the technical basics — file type, resolution, size, source. That alone handles part of the main-image bar. On top of that you can ask for:
Descriptions. What's in the frame, which makes plain-language selection possible later.
Text found inside the image. Watermarks, labels, packaging copy, spec panels, dimension diagrams. Useful twice over: it disqualifies images carrying someone else's branding, and in B2B it often surfaces data you were missing from your text fields entirely.
Tags. Yes/no questions you define, answered per image. Is the background clear? Is the product shown on a model? Is this a packaging shot? This is exactly how you encode your main-image standard — each requirement becomes a question. Tags are configured per customer, since a fashion catalog and an industrial parts catalog ask completely different things. Enterprise customers can have these built out with our support team.
Select twice, with different rules
The Select images step sorts the pool into output fields, and each rule writes to its own target. That's what lets you handle both problems in one pass.
For the main image, be strict. Stack the filters: minimum resolution, required tags for clear background and no packaging, plain-language instructions like "select an image showing the product alone, without a model." Take one image. If nothing qualifies, you want to know that — an empty field is more honest than a wrong one.
For gallery images, be permissive. Loosen the resolution floor, drop the background requirement, and prioritize variety: different angles, in-use shots, detail crops. Take several.
One practical note: plain-language selection ranks images by their descriptions, so Analyze images has to run first with descriptions enabled. Skip it and selection has nothing to reason about. You won't get an error — just results that look random.
When nothing qualifies, make one
Sometimes the pool contains a good, sharp, correct photo of the product that fails on background alone.
Don't discard it. The Remove background step will clear it or drop in a flat color, which turns a lifestyle shot into a compliant primary image. For catalogs where the only available photography is contextual, this is often the difference between listing a product and not.
More involved editing is available through our support team.
Then check a sample
Automated selection gets you most of the way; review closes the gap. Dyver's Catalog lets you open a product, move images between fields, and remove what doesn't belong.
Check a sample, not the whole catalog. If twenty products look right, your criteria work. If they don't, fix the criteria and rerun — correcting products one at a time is a treadmill.
Where to start
Pick one product group. Collect a generous pool. Analyze it properly. Then write two sets of selection rules — one strict, one permissive — and run them on twenty products.
Look at what comes out. Adjust. Then scale.
The goal isn't just more images. It's a main image that qualifies on every product, and enough behind it to close the sale.